Animating
An animation is a set of values that change over time. You set a value at one frame, another value at a later frame, and the editor fills in the frames between. Each stored value is a keyframe.
See also: Editor guide, Drawing and layers, Keyboard shortcuts.
The timeline
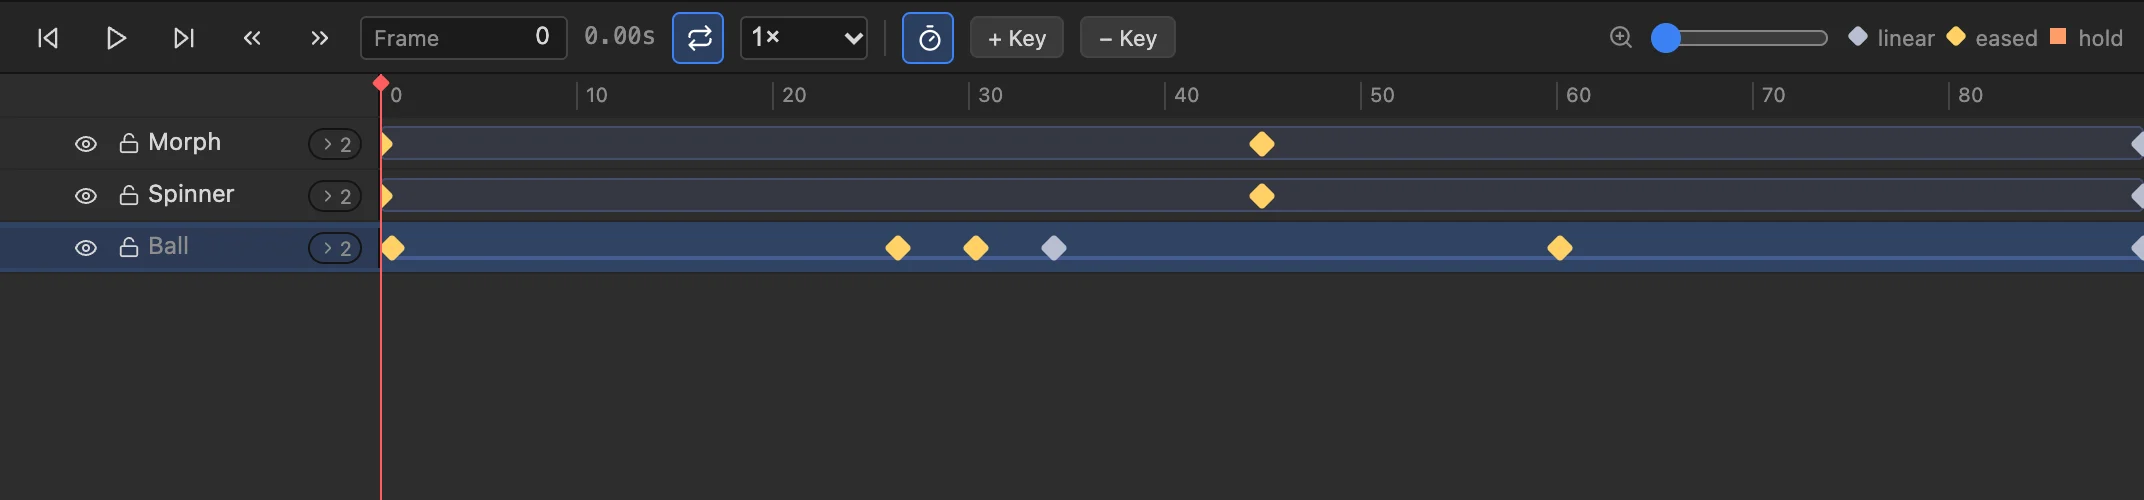
The timeline is at the bottom of the window.
| Part | What it does |
|---|---|
| Playback buttons | First frame, play or pause, last frame, previous and next keyframe |
| Frame field | The frame under the playhead. Type a number to jump |
| Loop button | On: playback repeats. Off: it stops at the end |
| Speed menu | Preview faster or slower. Does not change the document |
| Auto-key button | On: changing a value writes a keyframe at the playhead |
| Add keyframe, delete keyframes | For the selected layer, at the playhead |
| Timeline zoom | Stretches the time ruler to see keyframes that are close together |
| Layer rows | One row per layer, in the same order as the Layers panel |
| Diamonds | Keyframes |
| Bar behind a row | The frames in which the layer is visible |
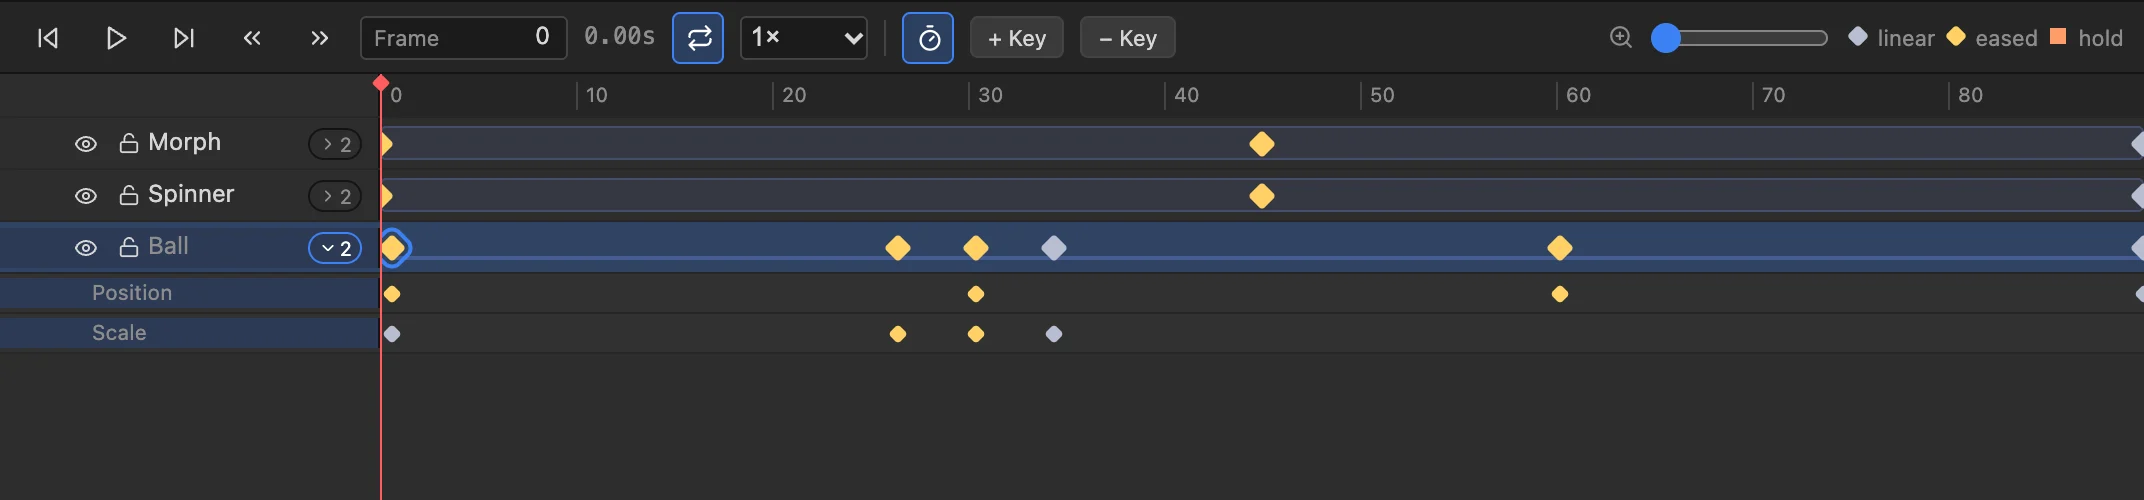
Open a layer's row with the arrow beside its name to see one row for each animated property: position, scale, rotation, opacity, fill, stroke, trim, path and so on.
Moving in time
| Action | How |
|---|---|
| Play or pause | Enter |
| Move the playhead | Drag in the time ruler |
| Previous or next frame | , and . |
| First or last frame | Home, End |
| Previous or next keyframe | < and > |
Keyframes
Make a keyframe by changing something
Auto-key is on by default. The status bar shows its state.
- Select a layer.
- Move the playhead to the frame where the change should be complete.
- Change the layer: drag it, scale it, rotate it, or type a value in Properties.
A keyframe is written at that frame. The first time a property is animated, the value it had before is kept at the frame where it started, so the change has a beginning.
With Auto-key off, changing a value that has no keyframes changes it for the whole timeline.
Make a keyframe without changing anything
Press K (Animation > Add keyframe at playhead). This stores the current values at the playhead. Use it to hold something still: two equal keyframes with a gap between them keep the layer in place over that gap.
What can be animated
Position, scale (width and height separately), rotation, opacity, corner radius, fill colour, gradient, stroke colour, stroke width, dashes, the trimmed part of a stroke, and the shape of a path.
Editing keyframes
| Action | How |
|---|---|
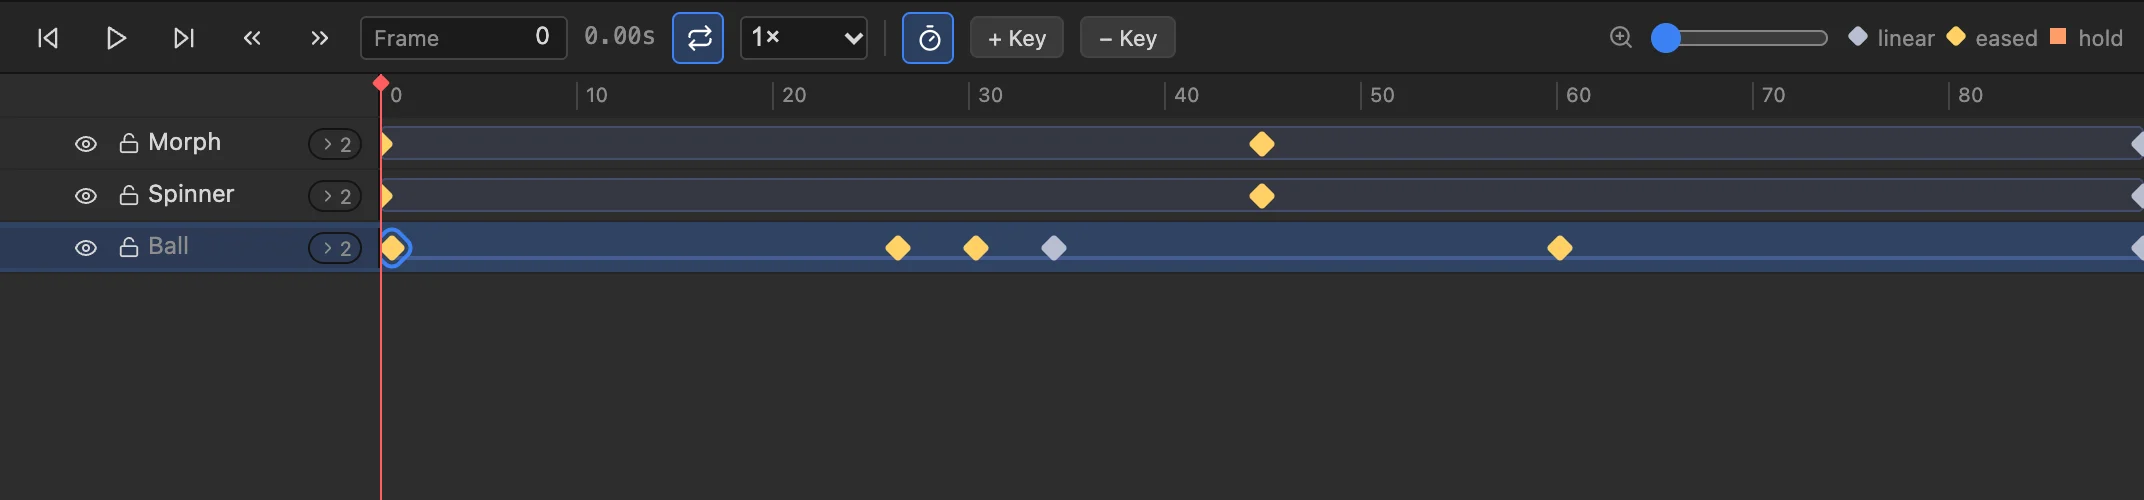
| Select | Click a diamond |
| Move in time | Drag it left or right |
| Delete | Select it and press Delete |
| Delete all of a layer's keyframes at the playhead | Animation > Delete keyframes at playhead |
| Copy and paste | Select a keyframe, Ctrl/⌘ + C, move the playhead, Ctrl/⌘ + V |
| Change the value | Put the playhead on the keyframe (use < and >), then change the value |
Delete removes the selected keyframe if there is one. Otherwise it deletes the layer.
Easing
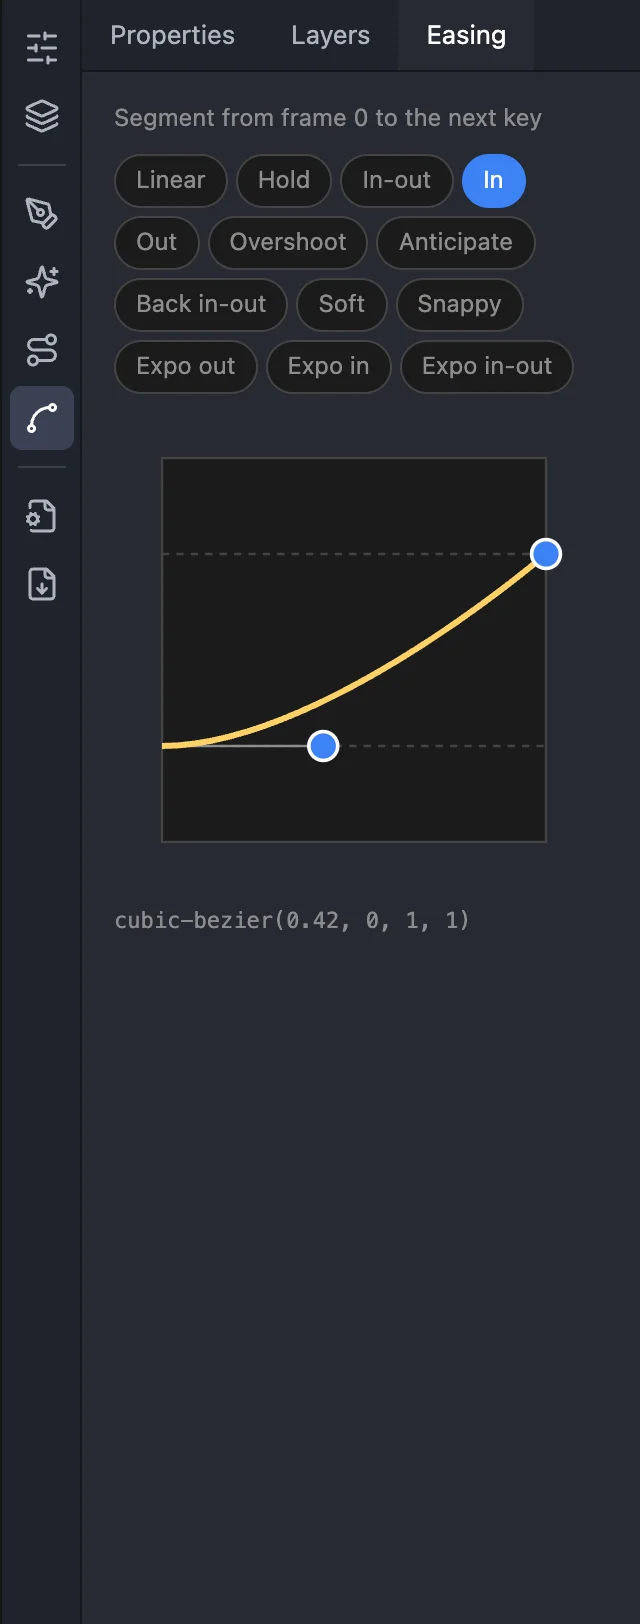
Easing is the speed between two keyframes. Without it, motion is even and mechanical.
- Click a keyframe in the timeline. You are editing the stretch that follows it.
- Open the Easing panel.
- Pick a preset, or drag the handles of the curve.
| Preset | Feel |
|---|---|
| Linear | Even speed |
| Hold | No movement, then a jump at the next keyframe |
| In-out | Gentle start and stop. A good default |
| In | Starts slowly |
| Out | Ends slowly |
| Overshoot | Goes past the target, then settles |
| Anticipate | Pulls back before moving |
| Back in-out | Pulls back, then overshoots |
| Soft, Snappy | Mild and sharp versions of in-out |
| Expo in, Expo out, Expo in-out | Strong acceleration |
In the curve, time runs left to right and progress runs bottom to top. A steep part is fast; a flat part is slow. Pulling a handle above the top or below the bottom makes the value overshoot.
Motion presets
Ready-made animations: 33 of them in five groups.
| Group | Presets |
|---|---|
| In | Fade in, Slide in (four directions), Zoom in, Pop in, Spin in, Drop in |
| Out | Fade out, Slide out (four directions), Zoom out, Pop out, Spin out |
| Emphasis | Pulse, Heartbeat, Shake, Bounce, Wobble, Swing, Flash, Rubber band, Tada |
| Loop | Spin, Float, Breathe, Sway, Blink |
| Draw | Draw on, Draw off |
Try before you apply
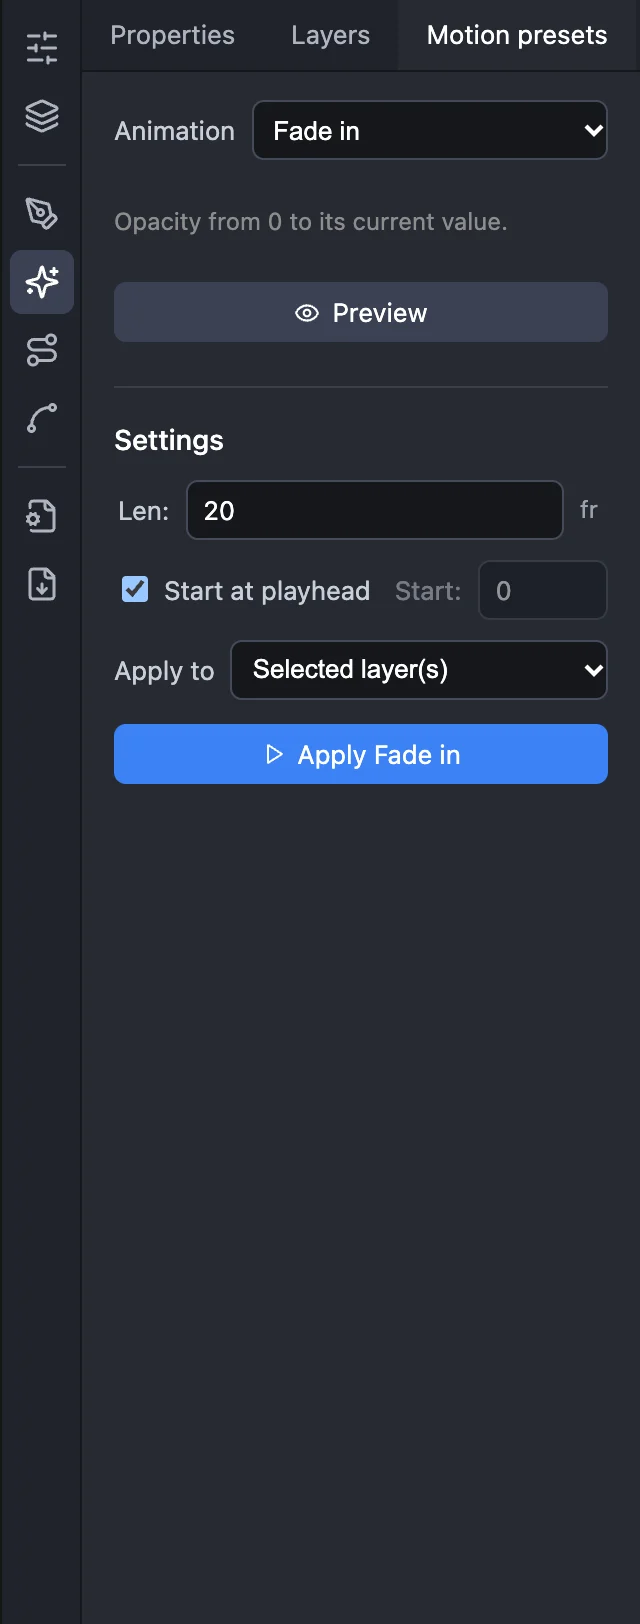
- Select one or more layers.
- Open the Motion Presets panel.
- Choose an animation from the dropdown.
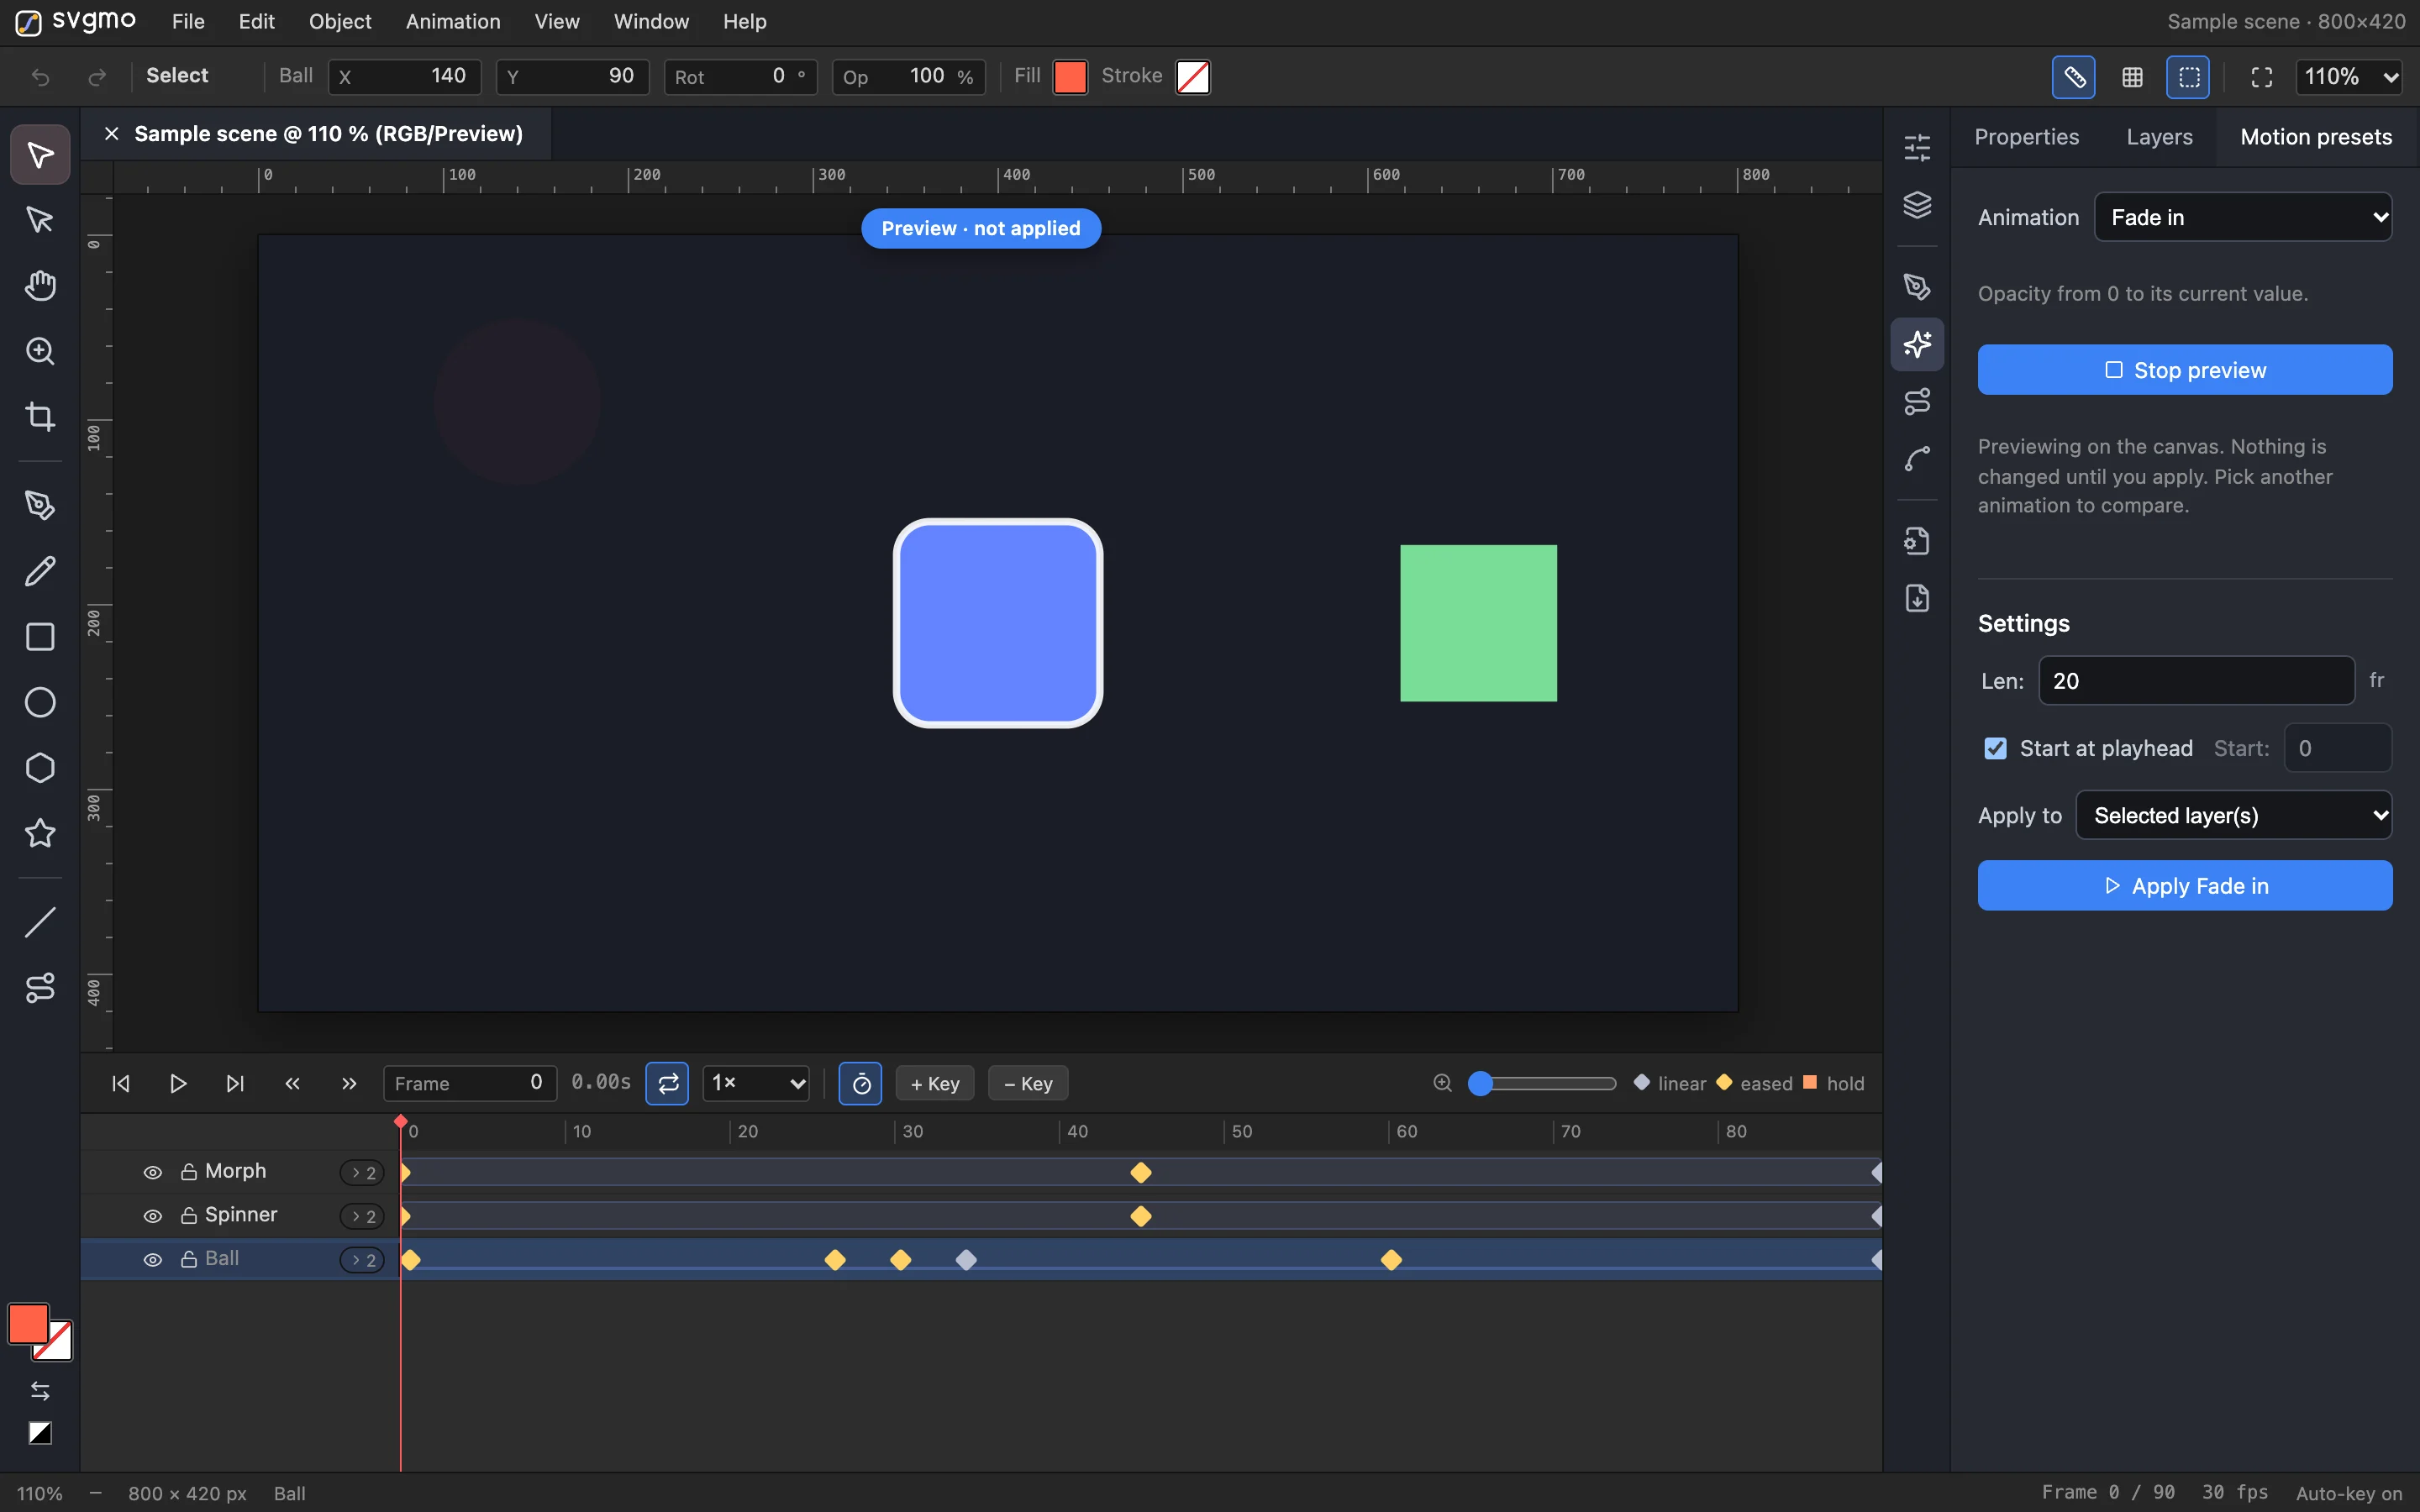
- Press Preview. It plays on the canvas. The document is not changed.
- Pick another animation to compare. Press Stop preview to end.
- Press Apply to write the keyframes.
While previewing, the animation plays on the canvas and the document is untouched:
Settings
| Setting | Meaning |
|---|---|
| Len | Length in frames |
| Cycles | How many times a looping preset repeats |
| Start at playhead | Begin where the playhead is. Untick to type a Start frame |
| Apply to | The selected layers, or All layers (stagger) |
| Stagger | With all layers: frames of delay between one layer and the next |
Presets add to what is there. A layer keeps its own position and size; the preset moves relative to them.
Draw on and Draw off need a stroke. Turn the fill off for the usual hand-drawn look.
Motion paths
A motion path is a curve that a layer travels along.
Add one
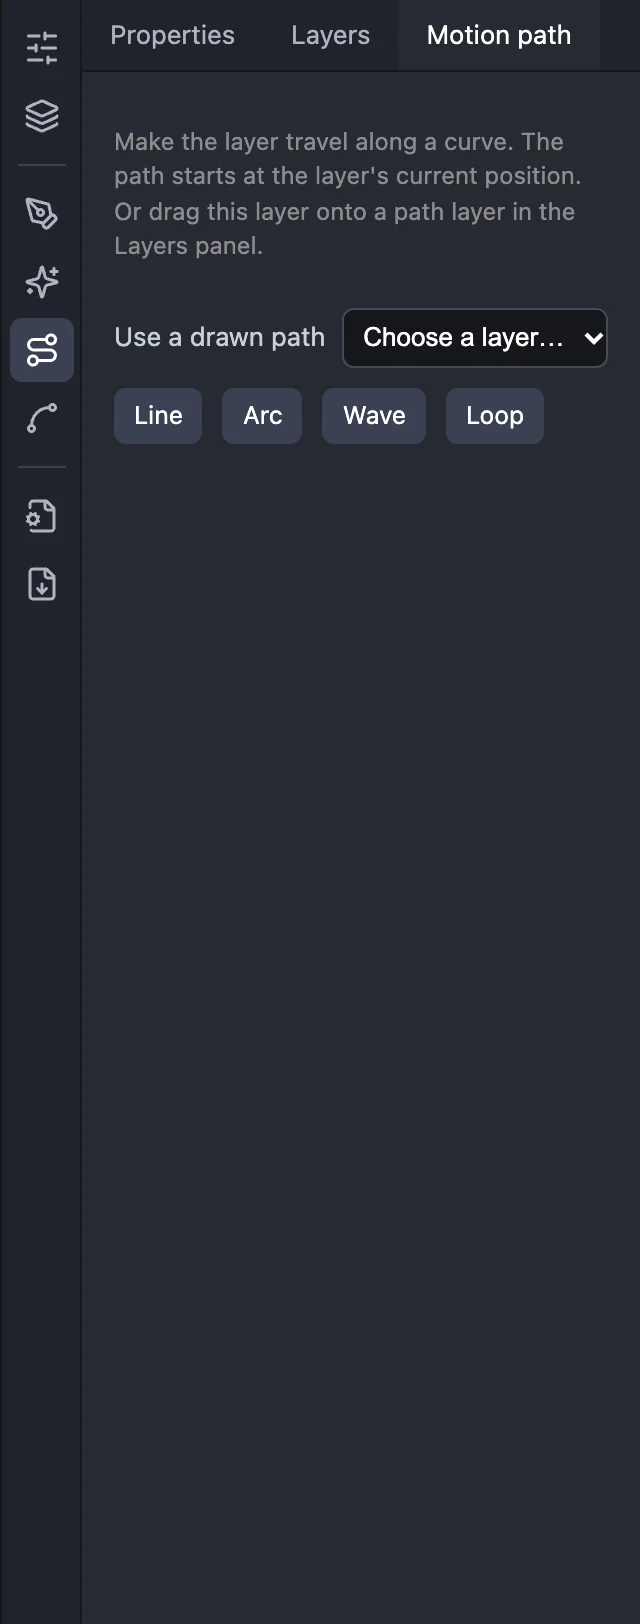
Any of these:
- Motion Path panel: select a layer and press Line, Arc, Wave or Loop. The path starts at the layer's current position.
- Pencil: select the layer, press N, set Draw as to Motion path of selected layer, and draw the route. Tick the record option and the layer travels at the speed you drew.
- Layers panel: draw a path with the pen, then drag the layer's row onto the path's row. The layer now follows that path. Drag the path out to detach.
- Object > Objects on Path > Add Motion Path: Line or Wave.
Shape it
Press M for the Motion path tool, then drag the points and handles on the canvas. In the panel, + Point and − Point add and remove points, and Reverse swaps the direction.
Settings
| Setting | Meaning |
|---|---|
| Start, End | The frames in which the layer travels |
| Speed | The easing of the whole trip |
| Orient to path | The layer turns to face the way it is going |
| Angle offset | Added to that direction, for artwork that does not point right |
| Repeat | How many times it travels the path. Every second trip can run backwards |
While a layer is on a path, X and Y in Properties are greyed out: the path sets the position. Rotation, scale and everything else can still be keyframed.
Remove takes the path away and leaves the layer where it is at that moment.
Morphing a shape
A path can change shape over time.
- Select a path layer. Convert a rectangle or ellipse first with Object > Shape > Convert to Path.
- Put the playhead on the first frame and press K.
- Move the playhead later.
- Press A and move the points.
The shape now changes between the two frames. Every keyframe needs the same number of points, so adding and removing points is switched off once a path is animated. Plan the number of points before the first keyframe.
A line that draws itself
- Give the layer a stroke and no fill.
- At the first frame, in Properties, set Trim … to to 0.
- Move the playhead later and set it to 100.
The stroke grows from its start to its end. Animate Trim from instead to erase it from the start. To draw the other way, use Reverse Path Direction. The Draw on preset does the same in one step.
Timing tools
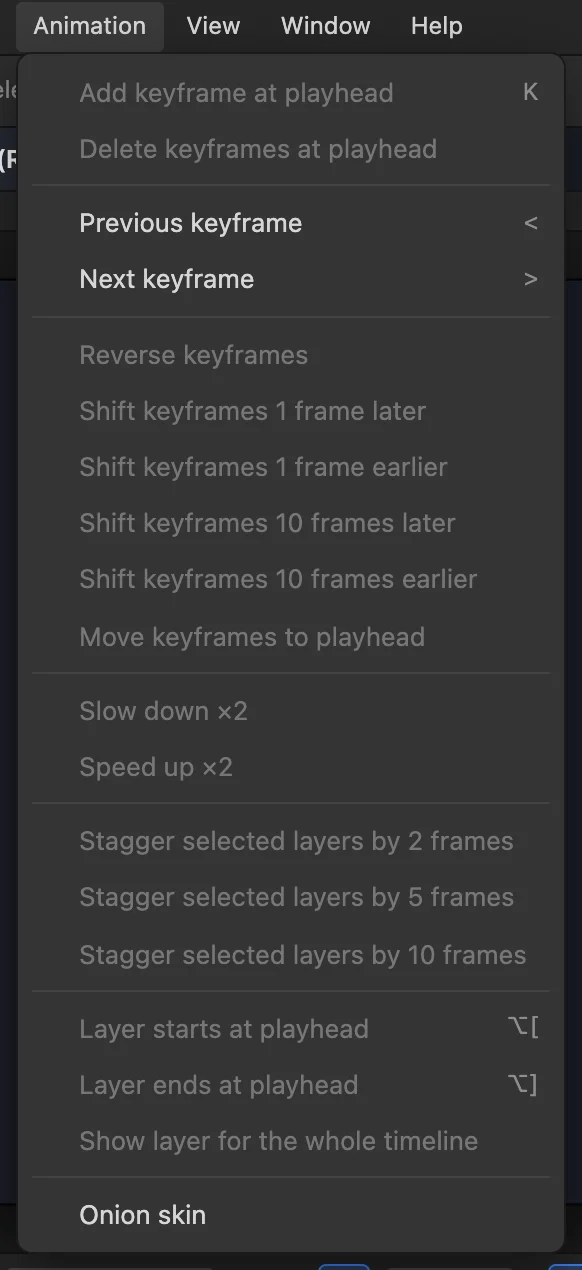
All in the Animation menu, for the selected layers.
| Command | What it does |
|---|---|
| Reverse keyframes | Plays the layer's animation backwards |
| Shift keyframes 1 or 10 frames later or earlier | Moves all of its keyframes |
| Move keyframes to playhead | Slides them so the first lands on the playhead |
| Slow down ×2, Speed up ×2 | Stretches or squeezes the spacing |
| Stagger selected layers by 2, 5 or 10 frames | Delays each selected layer after the one before, for a cascade |
Stagger is the quick way to make letters or list items arrive one after another: animate one, copy its keyframes to the others, select them all, and stagger.
When a layer is visible
Each layer has a bar in the timeline showing the frames in which it exists.
| Action | How |
|---|---|
| Trim the start or end | Drag an end of the bar |
| Slide the whole bar | Alt + drag it |
| Start at the playhead | Alt + [ |
| End at the playhead | Alt + ] |
| Visible for the whole timeline | Animation > Show layer for the whole timeline |
Outside its bar the layer is not drawn, whatever its opacity.
Onion skin
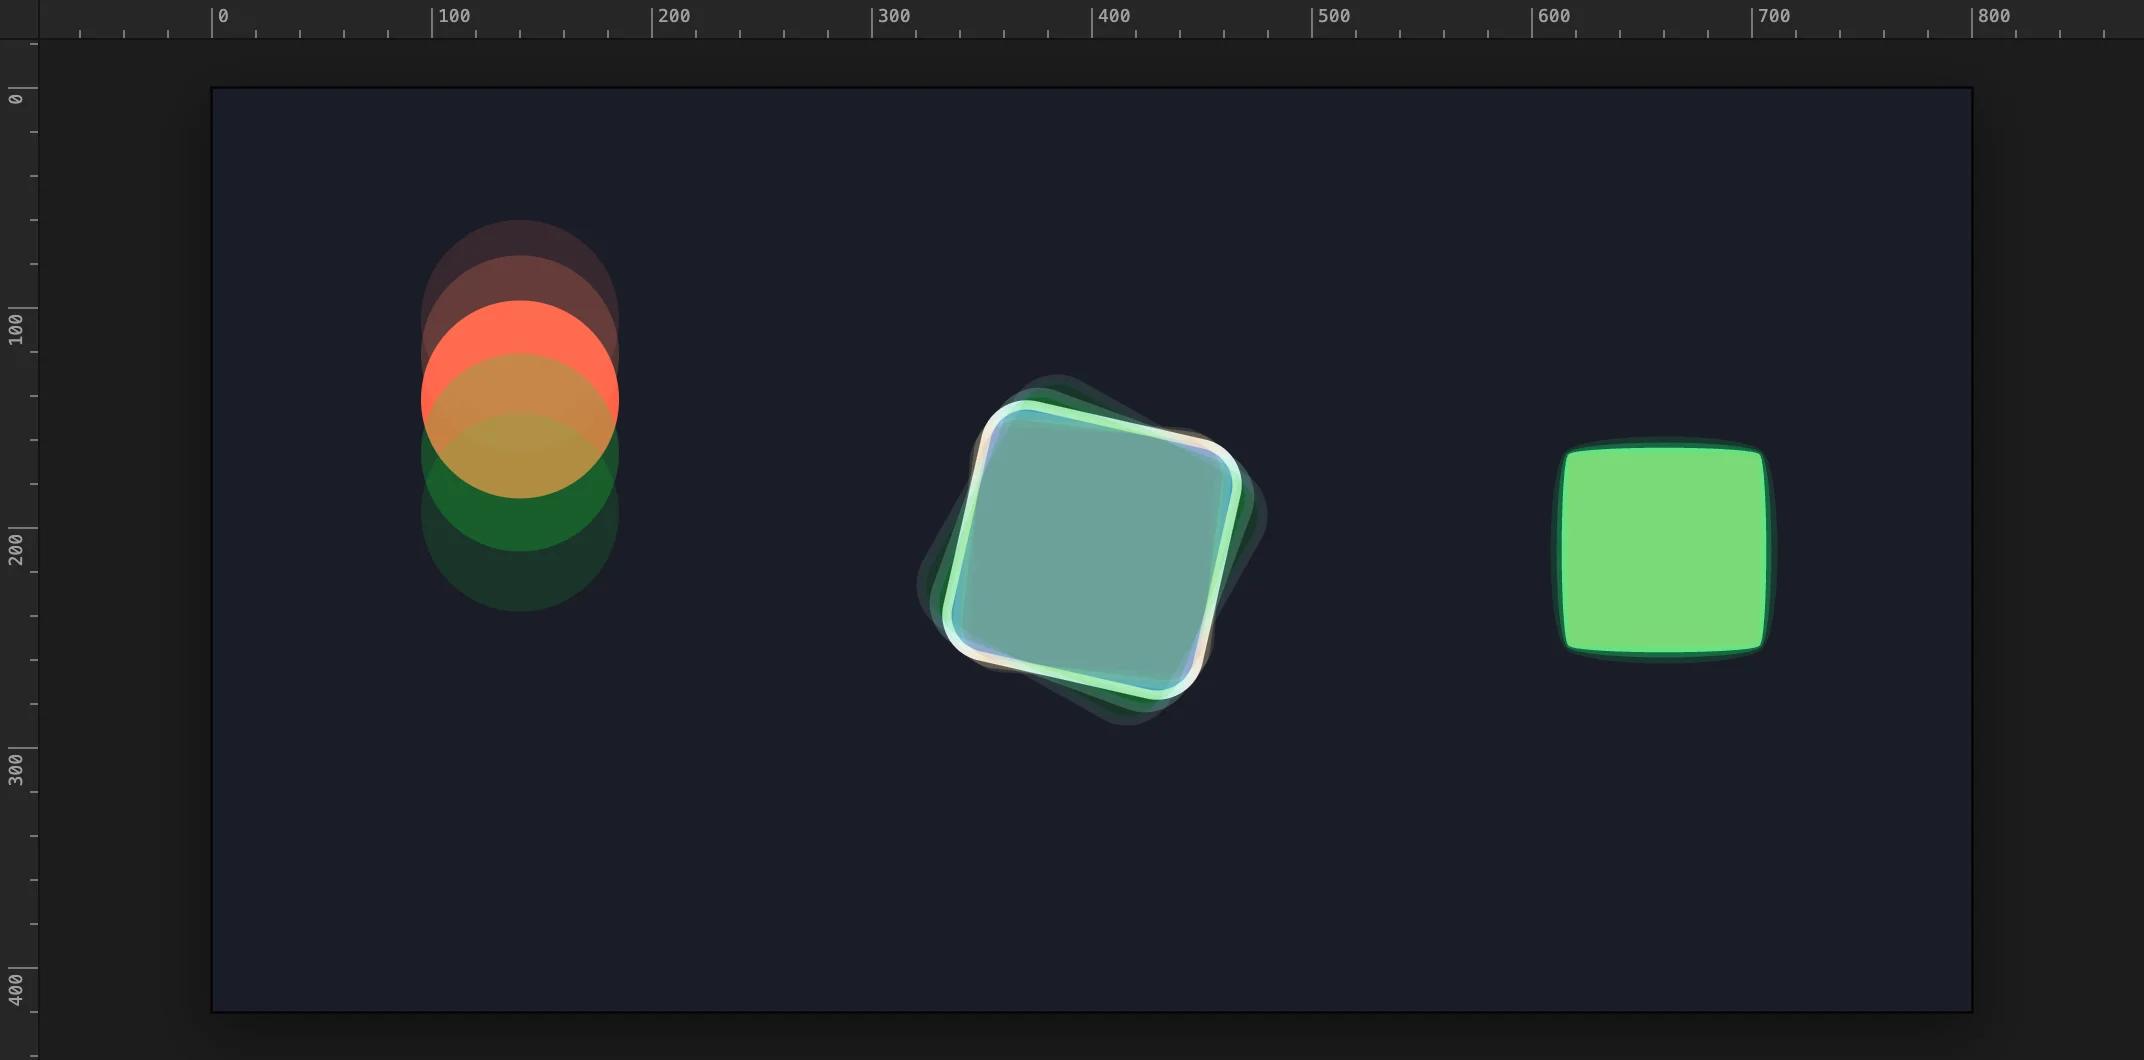
Animation > Onion skin shows faint copies of the frames around the playhead. Use it to judge spacing without playing.
Length and frame rate
Set both in File > Document Setup… or the Document panel.
- Duration is the number of frames.
- Frame rate is frames per second. 30 is common; 60 is smoother; 24 looks like film.
- Changing the frame rate keeps keyframes on the same frame numbers, so the animation plays faster or slower.
Recipes
Fade and rise into place
- Select the layer. Open Motion Presets.
- Choose Slide in from below, Preview, then Apply.
A loader that spins forever
- Draw an ellipse with a stroke and no fill.
- Set Trim … to to about 70 so there is a gap.
- Motion Presets > Spin, set Len to the full length of the timeline, Apply.
- Export as Animated SVG (no player needed).
Letters arriving one by one
- Import the word as SVG. See Importing artwork.
- Object > Split into Separate Shapes to get one layer per letter.
- Select all the letters. Motion Presets, choose Pop in, set Apply to to All layers (stagger) and Stagger to 3. Apply.
An object following a route
- Draw the route with the pen. Draw the object.
- In the Layers panel, drag the object's row onto the route's row.
- In the Motion Path panel tick Orient to path.
- Hide the route layer if it should not be seen.